F5 Firewall Solutions > [Archive3] Flowmon Integrated Out-of-path DDoS Solution > Module – DDoS Attack Source | Edit on
Initiate DDoS attack
Run SYN flood (hping3) from Attacker VM
Click on Attacker SSH icon to open
Attacker VMssh sessionFrom Attacker VM run SYN flood towards Web server
./syn_flood
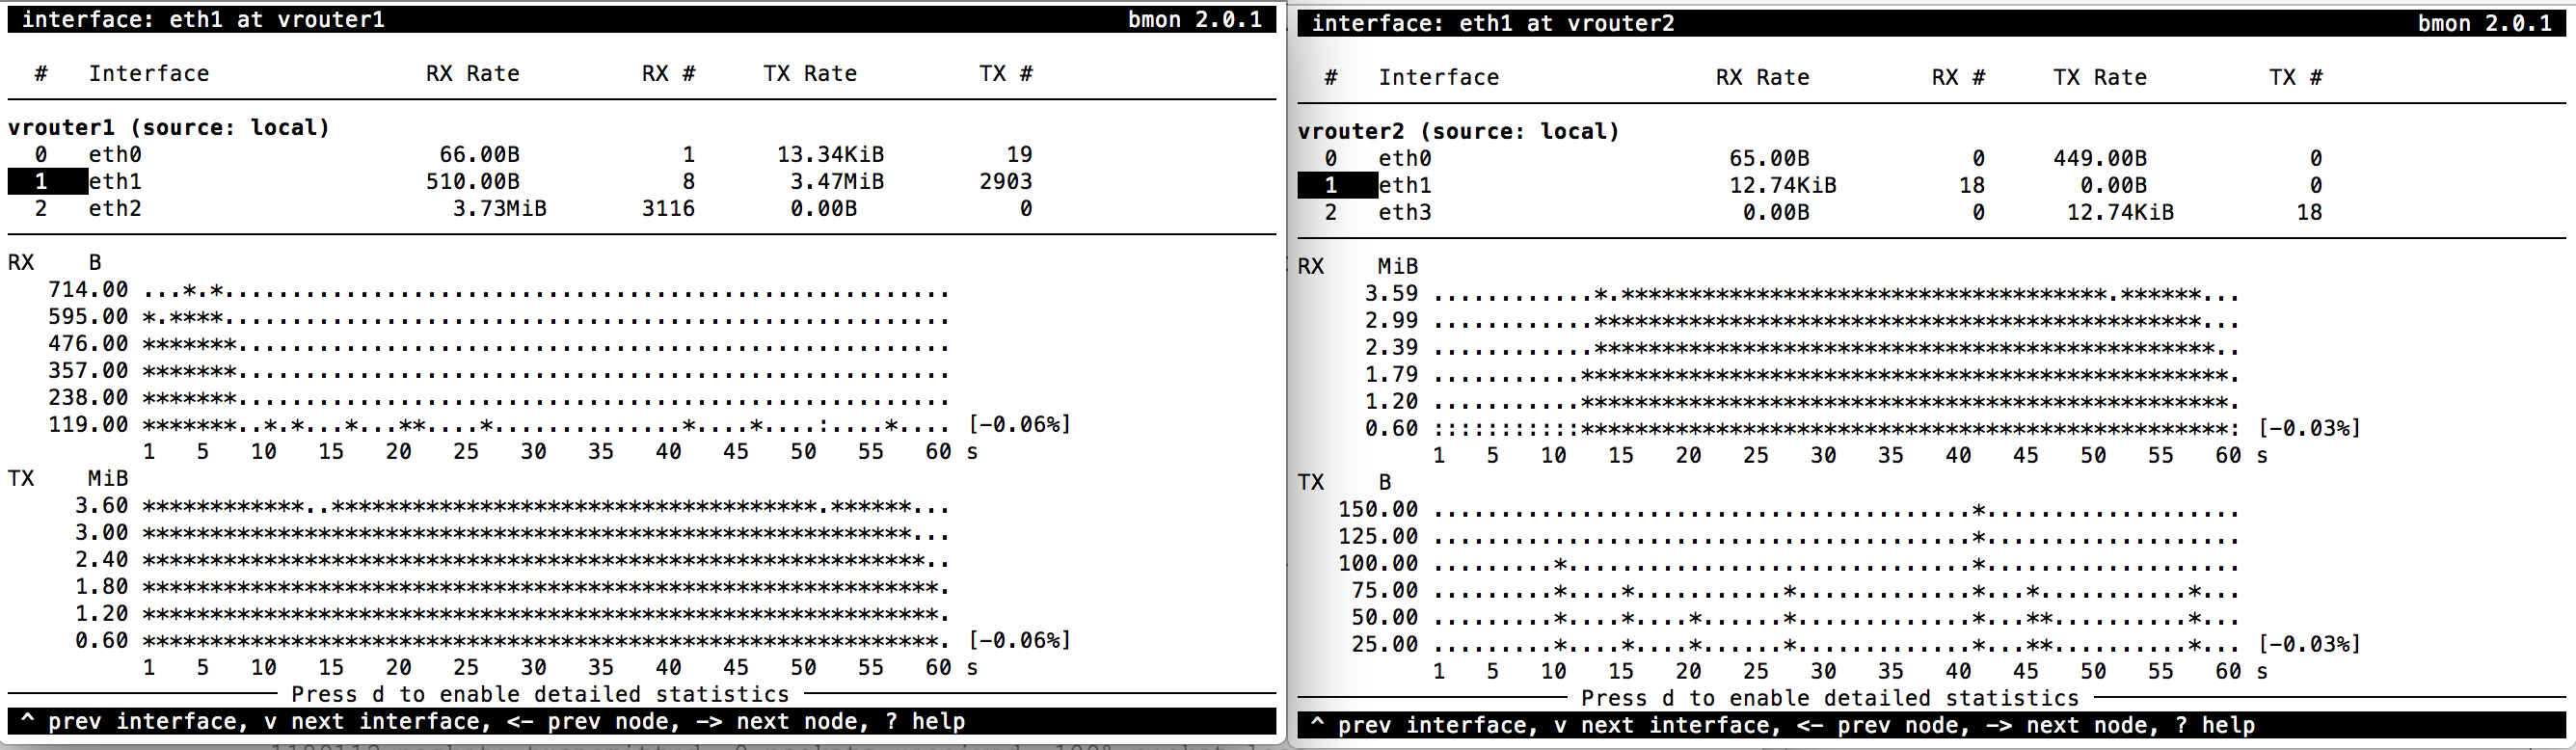
Observe traffic growth in both Router1 and Router2. After 15-45 seconds traffic will drop in Router2 due to DDoS detection and mitigation start
DDoS mitigation start
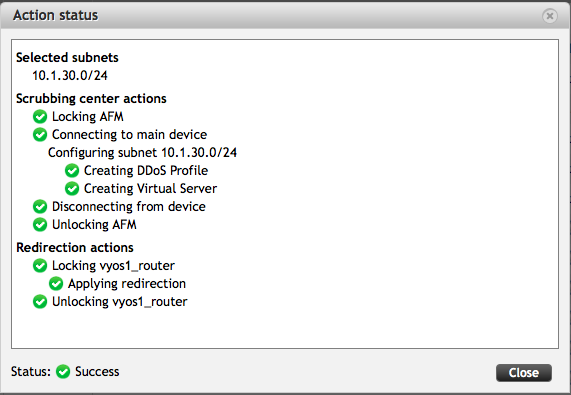
An ACTIVE attack with the new ID will appear in Flowmon DDoS defender ‘Active attacks’ screen. Flowmon dynamically provisions AFM DDoS profile and VS, and initiates traffic diversion to AFM using BGP advertisement

BGP route change and traffic drop
Router1 shows new route to protected
10.1.30.0/24subnetshow ip bgp
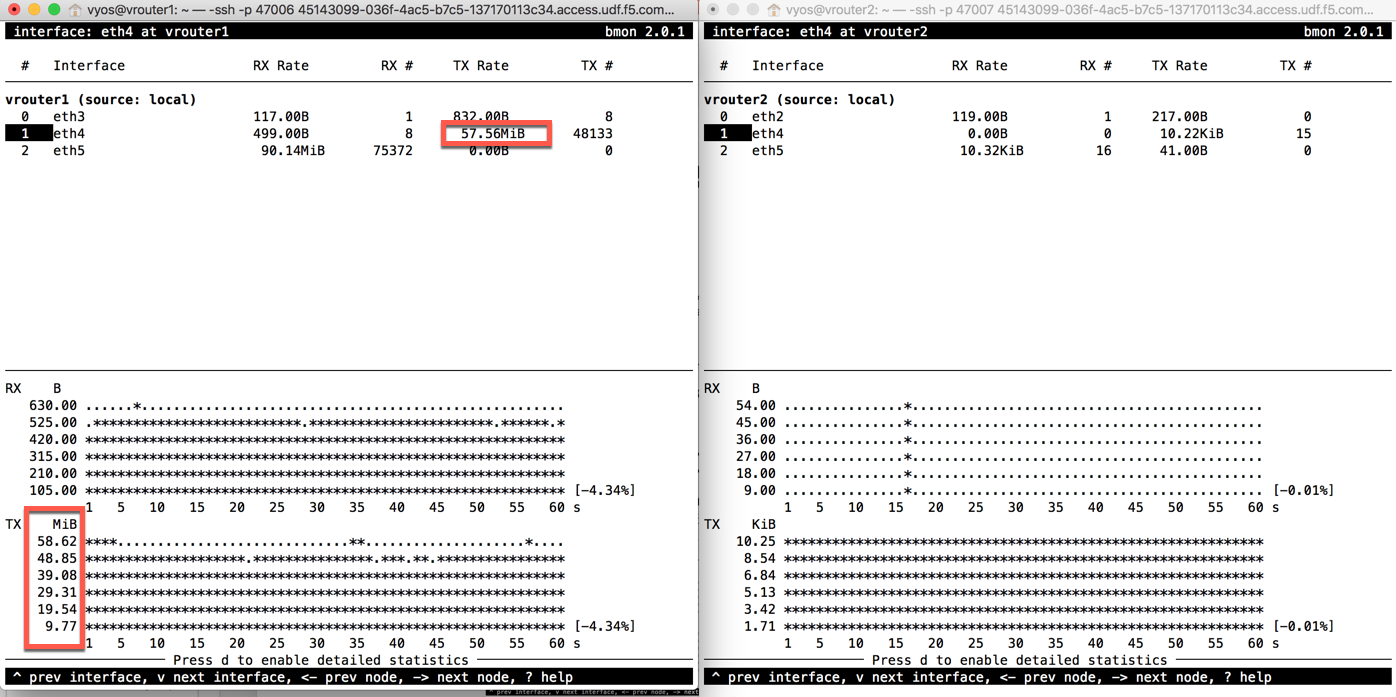
As traffic is being routed through AFM, Router2 shows no significant network activity while Router1 still experiences high traffic load
AFM DDoS profile and virtual server
Note
Flowmon uses iControl REST interface to provision necessary parameters in AFM
In AFM TMUI Navigate to Security –> DoS protection –> DoS profiles and confirm that the DoS profile has been provisioned for the protected subnet

In Local Traffic –> Virtual Servers –> Virtual Server List confirm that VS with corresponding Attack ID has been created

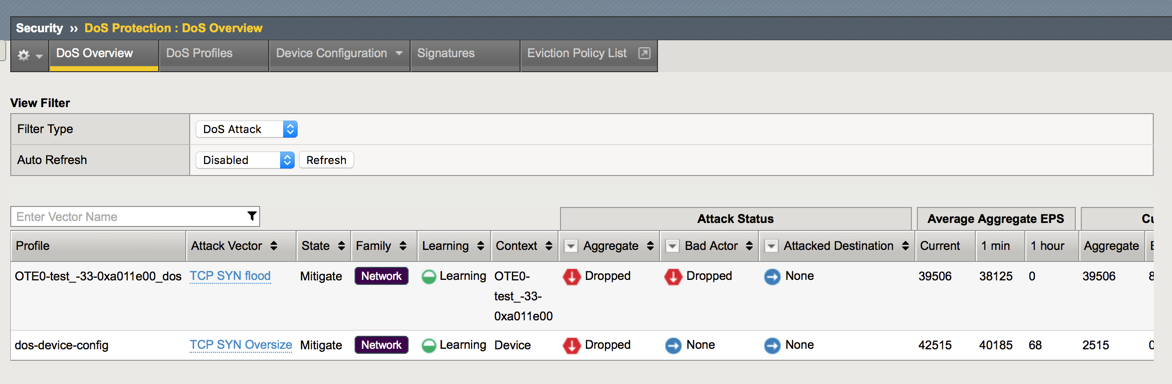
AFM DDoS mitigation
In AFM TMUI navigate to Security –> DoS Protection –> DoS Overview and confirm that AFM is performing DoS mitigation using the provisioned DoS profile
Note
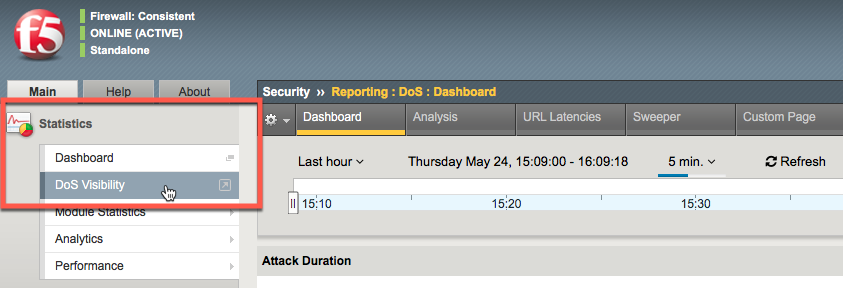
Statistics -> DoS Visibility TMUI menu provides graphical attack data
It may take up to ~5 minutes for DoS Visibility Dashboard to show our simulated DDoS attack. You may need to click Refresh for data to appear