F5 Firewall Solutions > Advanced Multi-Layer Firewall Protection > Module 1: F5 Multi-layer Firewall Source | Edit on
Lab 6: Configure HTTP security
HTTP security profiles are used to apply basic HTTP security to a virtual server. Significantly more advanced HTTP security is available by adding ASM (Application Security Manager).
Configure An HTTP Security Profile And Apply It To The External Virtual Server
On the BIG-IP:
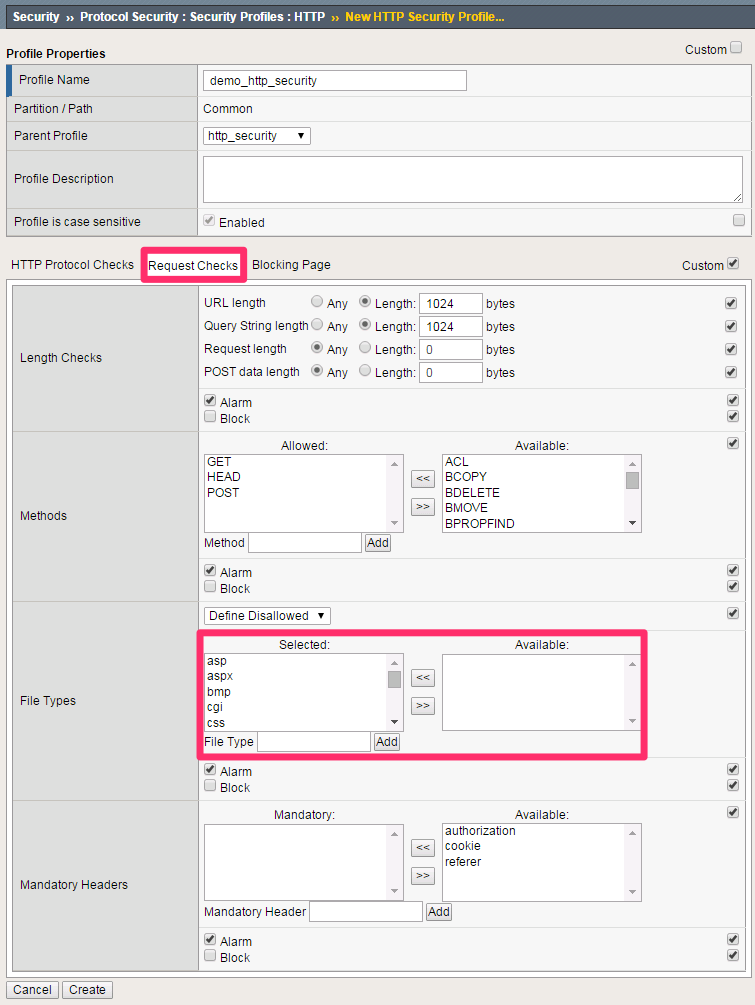
Navigation: Security > Protocol Security > Security Profiles > HTTP, confirm that the Security Profiles tab is selected then click Create.
| Profile Name | demo_http_security |
|---|---|
| Custom | Checked |
| Profile is case sensitive | Checked |
| HTTP Protocol Checks | Check All |

Note
Leave all other fields using the default values.
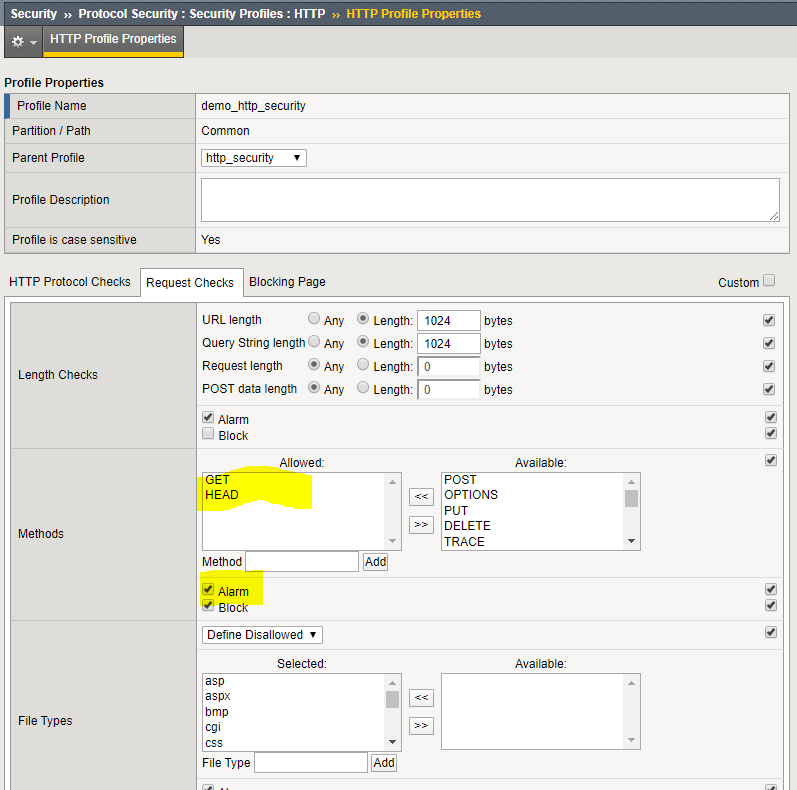
Navigation: Click Request Checks Tab.
Note
Leave the defaut Methods. Changing Methods is a powerful way to protect your web sites
| File Types | Select All |
Navigation: Click Blocking Page Tab.
| Response Type | Custom Response |
|---|---|
| Response Body | Insert “Please contact the helpdesk at x1234” as noted below |

Note
Leave all other fields using the default values.
Navigation: Click Create
Note
We did not put the policy in Blocking mode. We will do that after we verify functionality
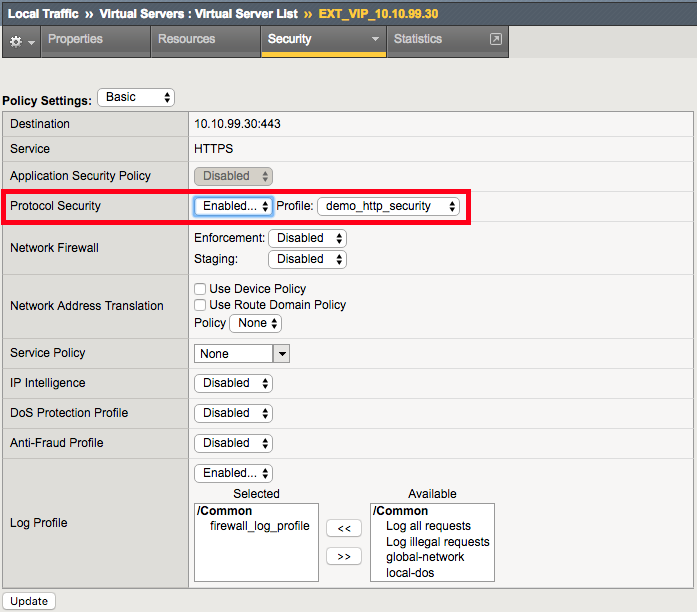
Apply the HTTP security profile to the external virtual server.
Navigation: Local Traffic > Virtual Servers > Virtual Server List >
Navigation: Select EXT_VIP_10.1.10.30
Navigation: Select the Security tab
| Protocol Security | Enabled | demo_http_security |
| Log Profile | selected | firewall_log_profile |
Note
Leave all other fields using the default values.
Navigation: Click Update.
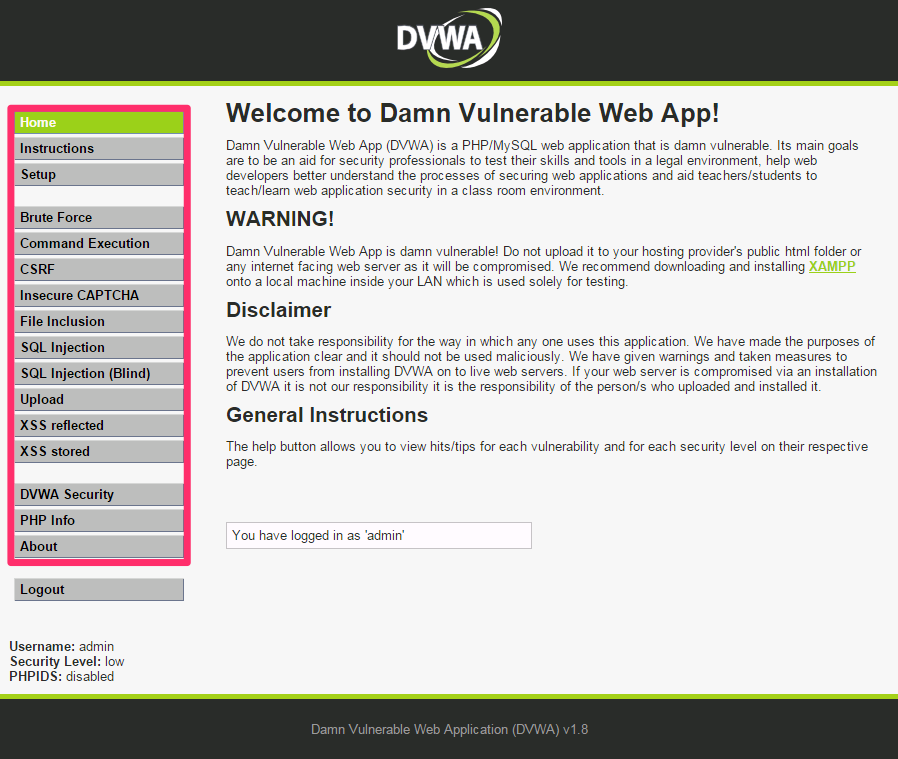
Open a new web browser tab, access the virtual server and log into the application.
URL: https://dvwa.com
Credentials: admin/password

Note
This application is accessible, even though there are policy violations, because the “Block” option in the HTTP security policy is not selected.
Browse the application.
Navigation: Click on various links on the sidebar.
Note
This traffic will generate network firewall log entries because the Alarm option in the HTTP security policy is selected.
On BIG-IP
Review the log entries created in the previous step.
Navigation: Security > Event Logs > Protocol > HTTP
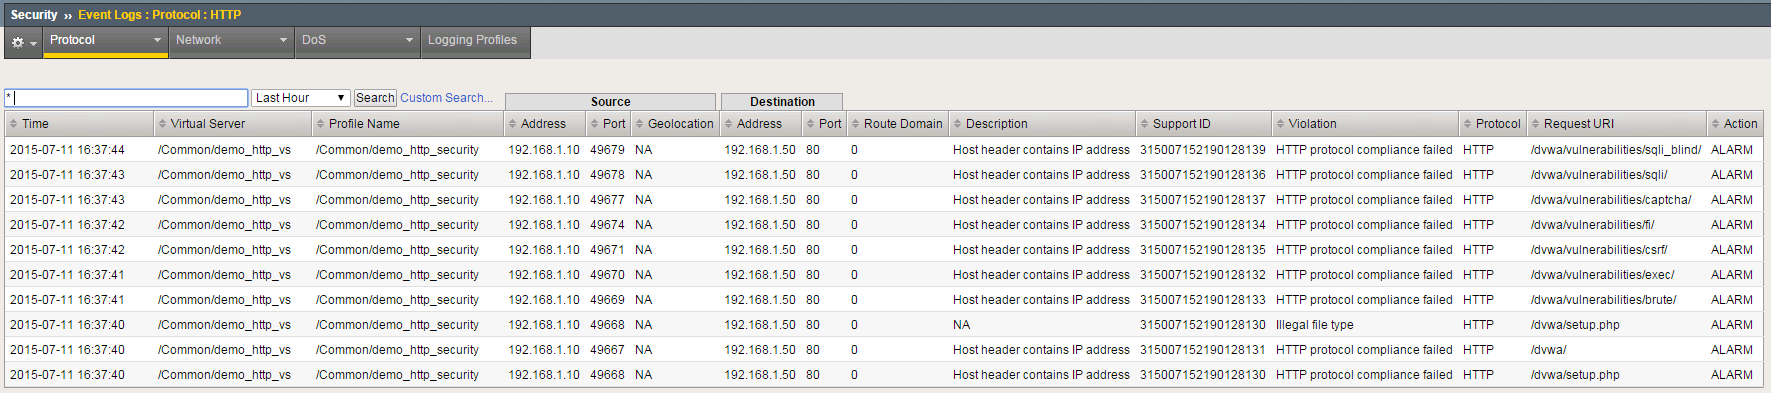
Note
Your log entries may be different than the example shown above but the concept should be the same.
Edit the demo_http_security HTTP security profile.
Navigation: Security > Protocol Security > Security Profiles > HTTP
Navigation: Select the demo_http_security profile
Navigation: Select the Request Checks Tab
| Methods | Remove Post From the Allowed Group. Check “Block” |
Note
Leave all other fields using the default values.
Navigation: Click Finished.
On Windows jumpbox
Close the Browser window to dvwa.com
Open a new web browser tab and access the virtual server.
URL: https://dvwa.com
Credentials: admin/password
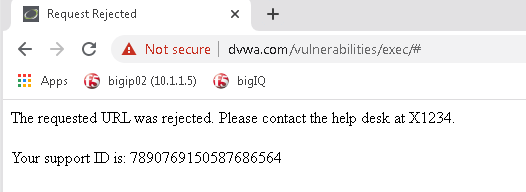
Attention
This action requires a “POST” action and will be blocked because this is not allowed.
Edit the demo_http_security HTTP security profile.
Navigation: Security > Protocol Security > Security Profiles > HTTP
Navigation: Select the demo_http_security profile
Navigation: Select the Request Checks Tab
| Methods | Add Post to the Allowed Group. Un-check “Block” |
Note
This is the end of Module 1 - Lab 6