F5 Firewall Solutions > [Archive2] F5 BIG-IP DDoS and DNS DoS Protections > Module 1 – Detecting and Preventing DNS DoS Attacks on a Virtual Server Source | Edit on
Base BIG-IP Configuration
In this lab, the VE has been configured with the basic system settings and the VLAN/self-IP configurations required for the BIG-IP to communicate and pass traffic on the network. We’ll now need to configure the BIG-IP to listen for traffic and pass it to the back end server.
Launch the Firefox shortcut titled Launch BIG-IP Web UI on the desktop of your lab jump server. The credentials for the BIG-IP are conveniently displayed in the login banner. Just in case: admin / 401elliottW!
Navigate to Local Traffic > Nodes and create a new node with the following settings, leaving unspecified fields at their default value:
Name: lab-server-10.10.0.50
- Address: 10.10.0.50
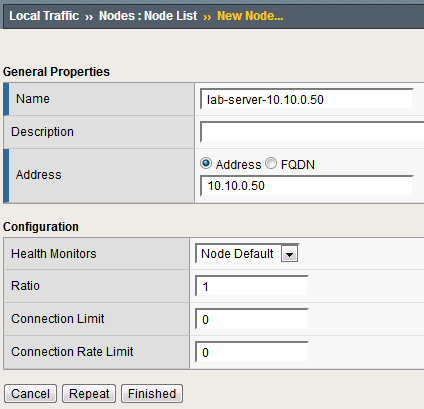
Click Finished to add the new node.
Navigate to Local Traffic > Pools and create a new pool with the following settings, leaving unspecified attributes at their default value:
Name: lab-server-pool
Health Monitors: gateway_icmp
New Members: Node List - Address: lab-server-10.10.0.50 - Service Port: * (All Ports)
- Click Add to add the new member to the member list.
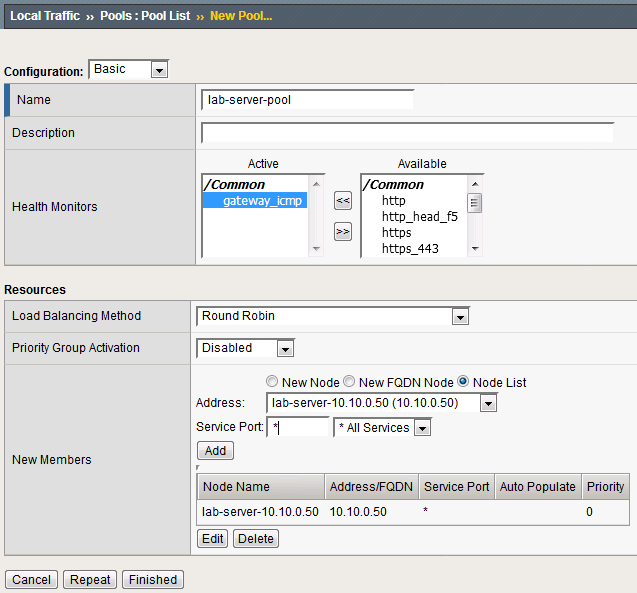
Click Finished to create the new pool.
Because the attack server will be sending a huge amount of traffic, we’ll need a fairly large SNAT pool. Navigate to Local Traffic > Address Translation > SNAT Pool List and create a new SNAT pool with the following attributes:
Name: inside_snat_pool
- Member List: 10.10.0.125, 10.10.0.126, 10.10.0.127, 10.10.0.128, 10.10.0.129, 10.10.0.130
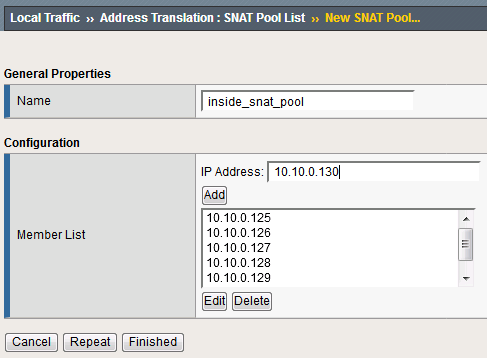
Click Finished to commit your changes.
Navigate to Local Traffic > Virtual Servers and create a new virtual server with the following settings, leaving unspecified fields at their default value:
Name: udp_dns_VS
Destination Address/Mask: 10.20.0.10
Service Port: 53
Protocol: UDP
Source Address Translation: SNAT
SNAT Pool: inside_snat_pool
- Default Pool: lab-server-pool
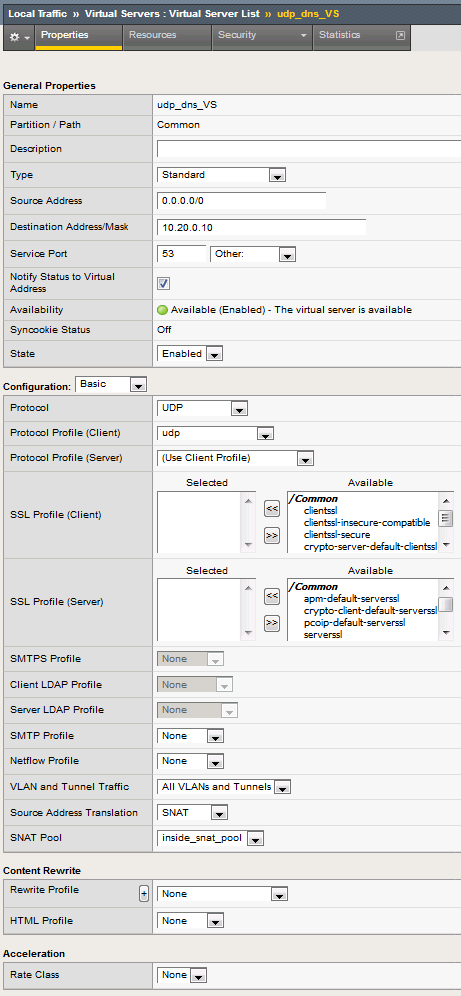
Click Finished.
We’ll now test the new DNS virtual server. SSH into the attack host by clicking the “Attack Host (Ubuntu)” icon on the jump host desktop.
Issue the dig @10.20.0.10 www.example.com +short command on the BASH CLI of the attack host. You should see output similar to:

This verifies that DNS traffic is passing through the BIG-IP.
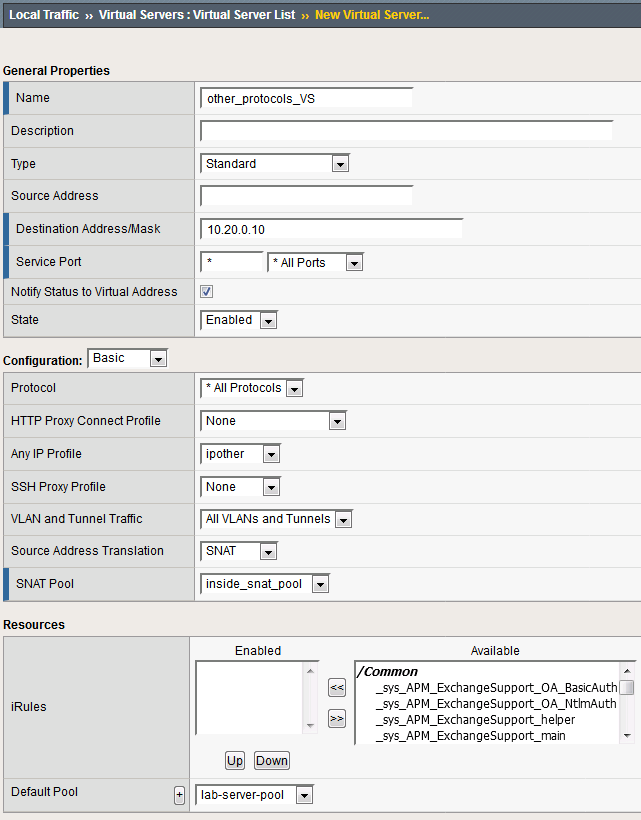
Return to the BIG-IP and navigate to Local Traffic > Virtual Servers and create a new virtual server with the following settings, leaving unspecified fields at their default value:
Name: other_protocols_VS
Destination Address/Mask: 10.20.0.10
Service Port: * (All Ports)
Protocol: * All Protocols
Any IP Profile: ipother
Source Address Translation: SNAT
SNAT Pool: inside_snat_pool
- Default Pool: lab-server-pool
Return to the Attack Host SSH session and attempt to SSH to the server using SSH 10.20.0.10. Simply verify that you are prompted for credentials and press CTRL+C to cancel the session. This verifies that non-DNS traffic is now flowing through the BIG-IP.
Detecting and Preventing DNS DoS Attacks on a Virtual Server
Establishing a DNS server baseline
Before we can attack our DNS server, we should establish a baseline for how many QPS our DNS server can handle. For this lab, let’s find the magic number of QPS that causes 50% CPU utilization on the BIND process.
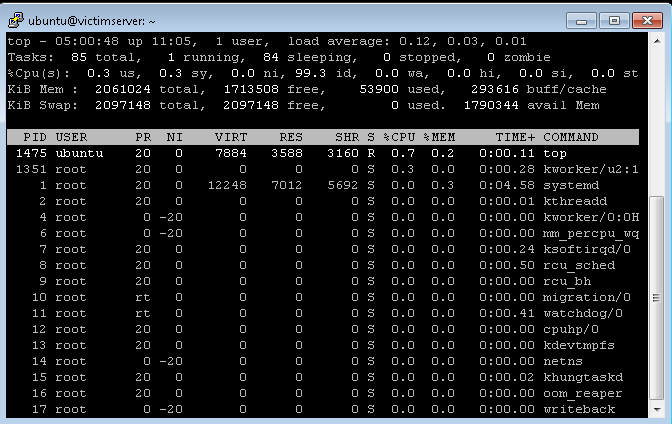
Connect to the Victim Server SSH session by double-clicking the Victim Server (Ubuntu) shortcut on the jump host desktop.
From the BASH prompt, enter top and press Enter to start the top utility.
You will see a list of running processes sorted by CPU utilization, like the output below:
Connect to the Attack Host SSH session by double-clicking the Attack Host (Ubuntu) shortcut on the jump host desktop.
- Start by sending 500 DNS QPS for 30 seconds to the host using the following syntax:dnsperf -s 10.20.0.10 -d queryfile-example-current -c 20 -T 20 -l 30 -q 10000 -Q 500
Hint
There is a text file on the desktop of the jump host with all of the CLI commands used in the lab for cut/paste use.
Observe CPU utilization over the 30 second window for the named process. If the CPU utilization is below 45%, increase the QPS by increasing the -Q value. If the CPU utilization is above 55%, decrease the QPS.
Record the QPS required to achieve a sustained CPU utilization of approximately 50%. Consider this the QPS that the server can safely sustain for demonstration purposes.
- Now, attack the DNS server with 10,000 QPS using the following syntax:dnsperf -s 10.20.0.10 -d queryfile-example-current -c 20 -T 20 -l 30 -q 10000 -Q 10000
You’ll notice that the CPU utilization on the victim server skyrockets, as well as DNS query timeout errors appearing on the attack server’s SSH session. This shows your DNS server is overwhelmed.
Configuring a DoS Logging Profile
We’ll create a DoS logging profile so that we can see event logs in the BIG-IP UI during attack mitigation.
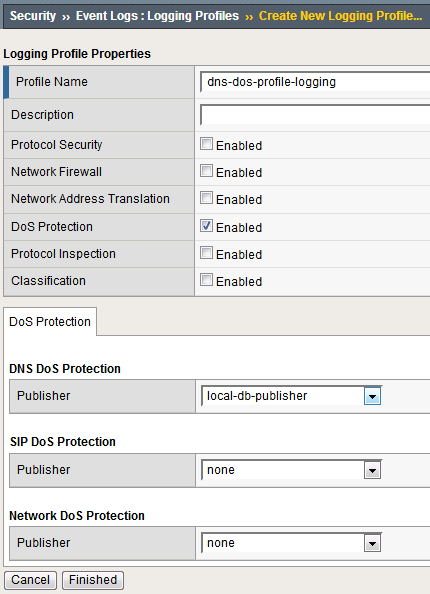
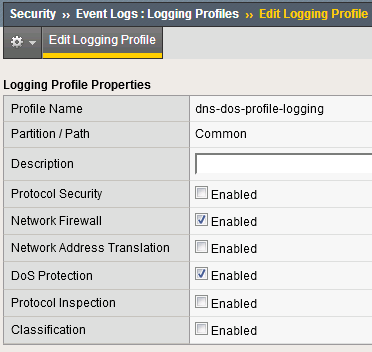
On the BIG-IP web UI, navigate to Security > Event Logs > Logging Profiles and create a new profile with the following values, leaving unspecified attributes at their default value:
Profile Name: dns-dos-profile-logging
DoS Protection: Enabled
- DNS DoS Protection Publisher: local-db-publisher
Configuring a DoS Profile
We’ll now create a DoS profile with manually configured thresholds to limit the attack’s effect on our server.
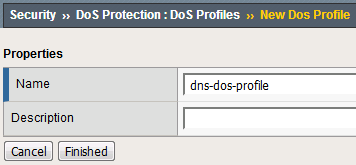
- Navigate to Security > DoS Protection > DoS Profiles and create a new DoS profile with the name dns-dos-profile.
The UI will return to the DoS Profiles list. Click the dns-dos-profile name.
Click the Protocol Security tab and select DNS Security from the drop-down.
Click the DNS A Query vector from the Attack Type list.
Modify the DNS A Query vector configuration to match the following values, leaving unspecified attributes with their default value:
State: Mitigate
Threshold Mode: Fully Manual
Detection Threshold EPS: (Set this at 80% of your safe QPS value)
- Mitigation Threshold EPS: (Set this to your safe QPS value)
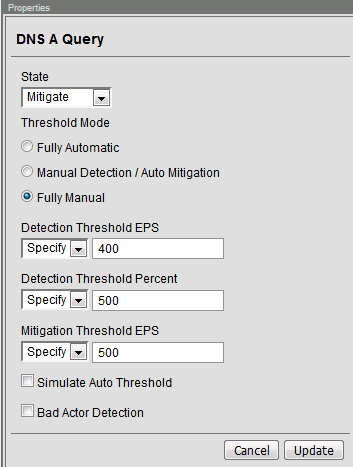
Make sure that you click Update to save your changes.
Attaching a DoS Profile
We’ll attach the DoS profile to the virtual server that we configured to manage DNS traffic.
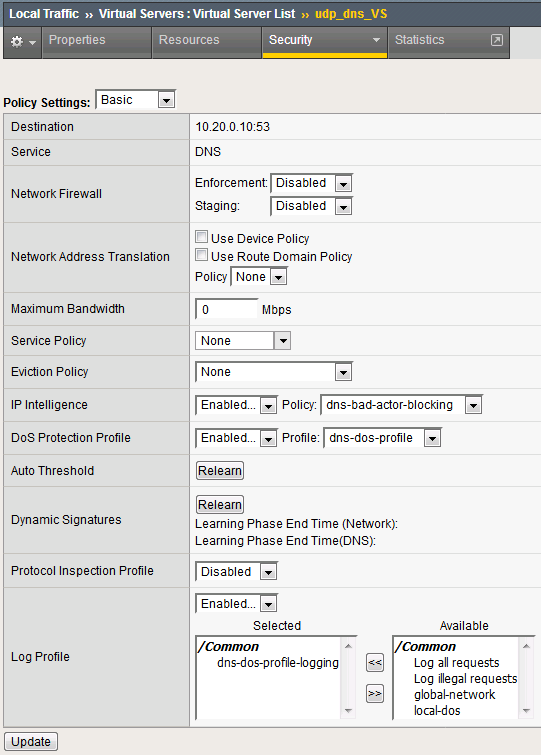
- Navigate to Local Traffic > Virtual Servers > Virtual Server List.
- Click on the udp_dns_VS name.
- Click on the Security tab and select Policies.
- In the DoS Protection Profile field, select Enabled and choose the dns-dos-profile.
- In the Log Profile, select Enabled and move the dns-dos-profile-logging profile from Available to Selected.
- Click Update.
Simulate a DNS DDoS Attack
Open the SSH session to the victim server and ensure the top utility is running.
- Once again, attack your DNS server from the attack host using the following syntax:dnsperf -s 10.20.0.10 -d queryfile-example-current -c 20 -T 20 -l 30 -q 10000 -Q 10000
On the server SSH session running the top utility, notice the CPU utilization on your server remains in a range that ensures the DNS server is not overwhelmed.
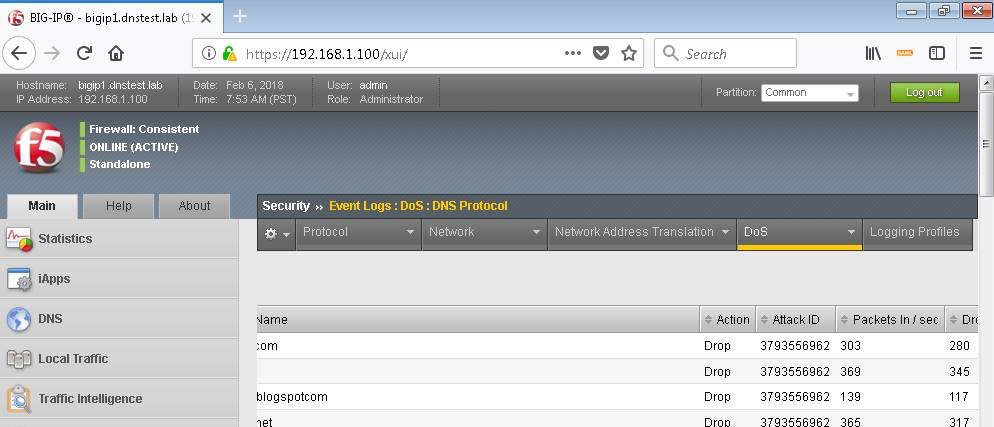
- After the attack, navigate to Security > Event Logs > DoS > DNS Protocol. Observe the logs to see the mitigation actions taken by the BIG-IP.
DNS DDoS Mitigations for Continued Service
At this point, you’ve successfully configured the BIG-IP to limit the amount of resource utilization on the BIG-IP. Unfortunately, even valid DNS requests can be caught in the mitigation we’ve configured. There are further steps that can be taken to mitigate the attack that will allow non-malicious DNS queries.
Bad Actor Detection
Bad actor detection and blacklisting allows us to completely block communications from malicious hosts at the BIG-IP, completely preventing those hosts from reaching the back-end servers. To demonstrate:
Navigate to Security > DoS Protection > DoS Profiles.
Click on the dns-dos-profile profile name.
Click on the Protocol Security tab then select DNS Security.
Click on the DNS A Query attack type name.
Modify the vector as follows:
Bad Actor Detection: Checked
Per Source IP Detection Threshold EPS: 80
Per Source IP Mitigation Threshold EPS: 100
Add Source Address to Category: Checked
Category Name: denial_of_service
Sustained Attack Detection Time: 15 seconds
- Category Duration Time: 60 seconds
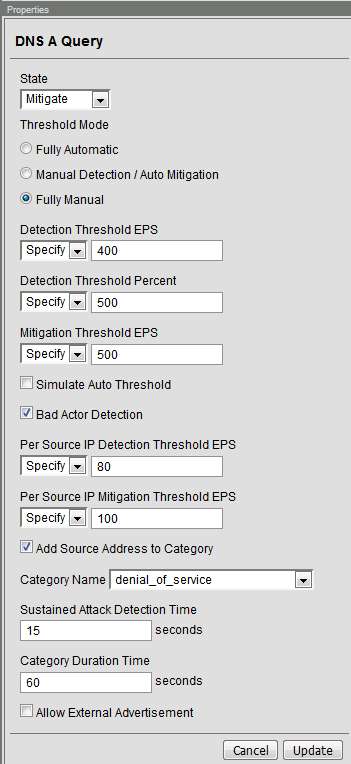
Make sure you click Update to save your changes.
Navigate to Security > Network Firewall > IP Intelligence > Policies and create a new IP Intelligence policy with the following values, leaving unspecified attributes at their default values:
Name: dns-bad-actor-blocking
Default Log Actions section:
- Log Blacklist Category Matches: Yes
Blacklist Matching Policy
Create a new blacklist matching policy:
- Blacklist Category: denial_of_service
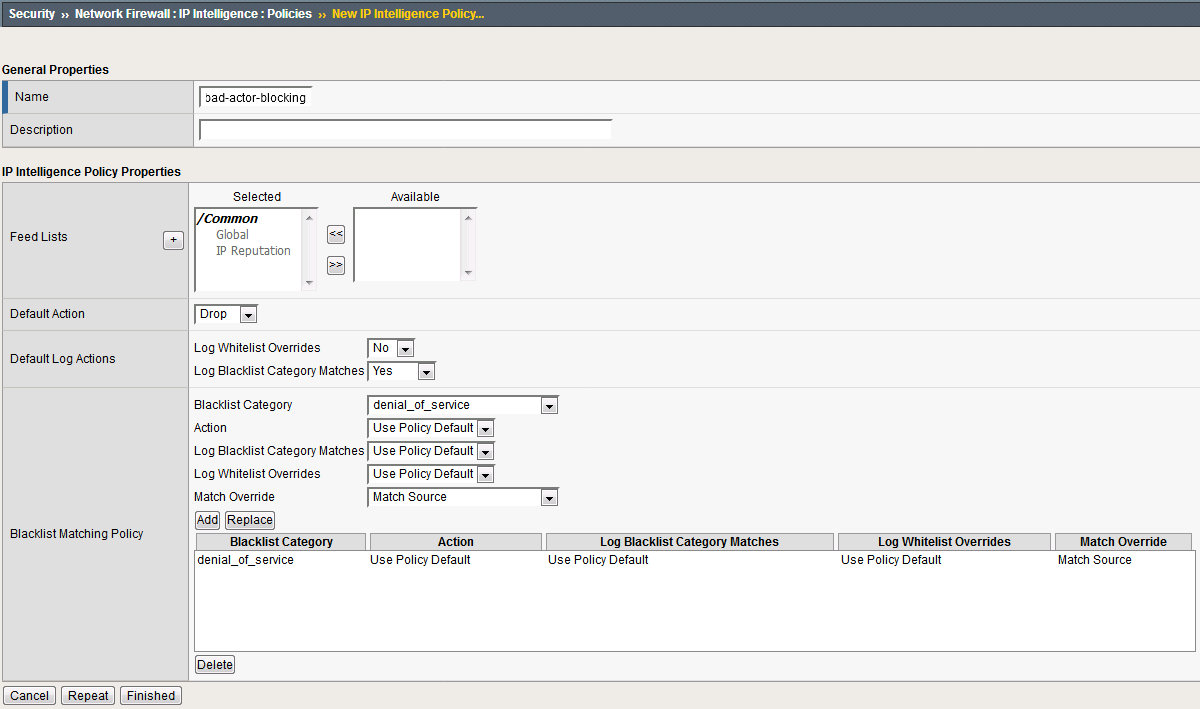
Click Add to add the policy.
Click Finished.
Navigate to Local Traffic > Virtual Servers > Virtual Server List.
Click on the udp_dns_VS virtual server name.
Click on the Security tab and select Policies.
- Enable IP Intelligence and choose the dns-bad-actor-blocking policy.
Make sure you click Update to save your changes.
Navigate to Security > Event Logs > Logging Profiles.
Click the global-network logging profile name.
- Under the Network Firewall tab, set the IP Intelligence Publisher to local-db-publisher and check Log Shun Events.
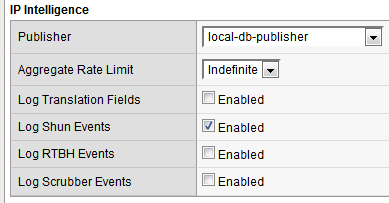
Click Update to save your changes.
Click the dns-dos-profile-logging logging profile name.
- Check Enabled next to Network Firewall.
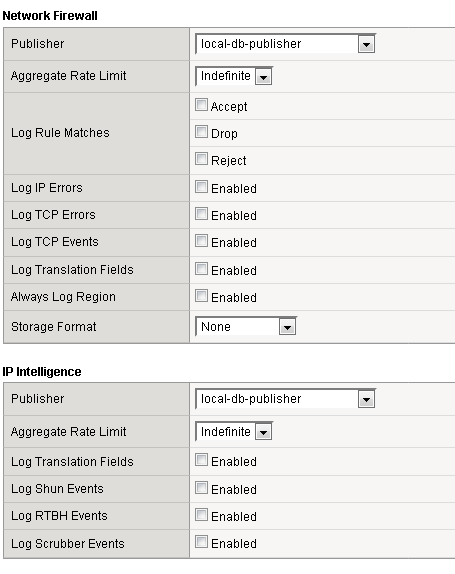
- Under the Network Firewall tab, change the Network Firewall and IP Intelligence Publisher to local-db-publisher and click Update.
Bring into view the Victim Server SSH session running the top utility to monitor CPU utilization.
- On the Attack Server host, launch the DNS attack once again using the following syntax:dnsperf -s 10.20.0.10 -d queryfile-example-current -c 20 -T 20 -l 30 -q 10000 -Q 10000
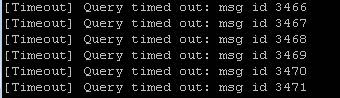
- You’ll notice CPU utilization on the victim server begin to climb, but slowly drop. The attack host will show that queries are timing out as shown below. This is due to the BIG-IP blacklisting the bad actor.
Navigate to Security > Event Logs > Network > IP Intelligence. Observe the bad actor blocking mitigation logs.
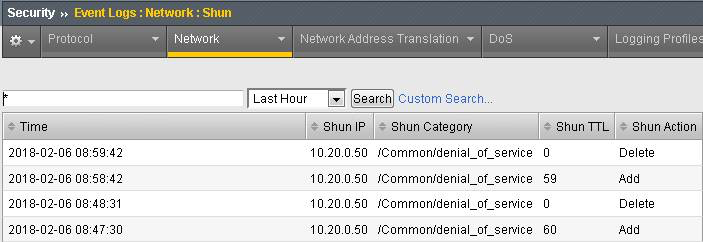
- Navigate to Security > Event Logs > Network > Shun. This screen shows the bad actor being added to (and later deleted from) the shun category.
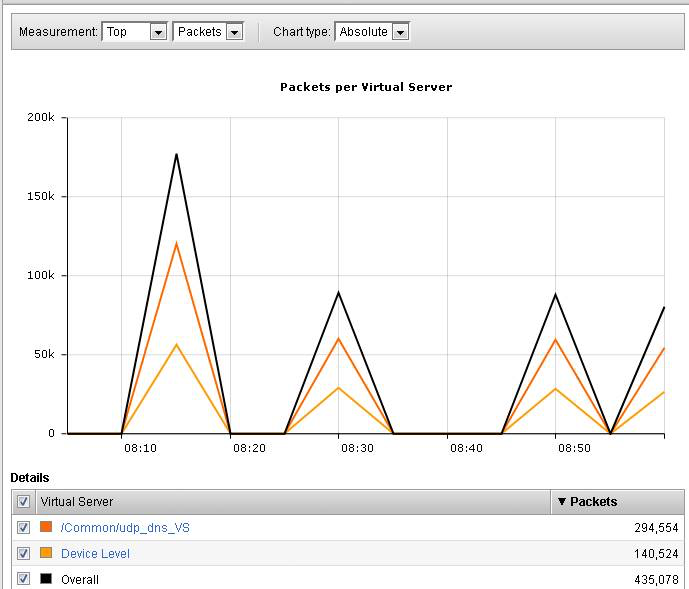
- Navigate to Security > Reporting > Protocol > DNS. Change the View By drop-down to view various statistics around the DNS traffic and attacks.
Navigate to Security > Reporting > Network > IP Intelligence. The default view may be blank. Change the View By drop-down to view various statistics around the IP Intelligence handling of the attack traffic.
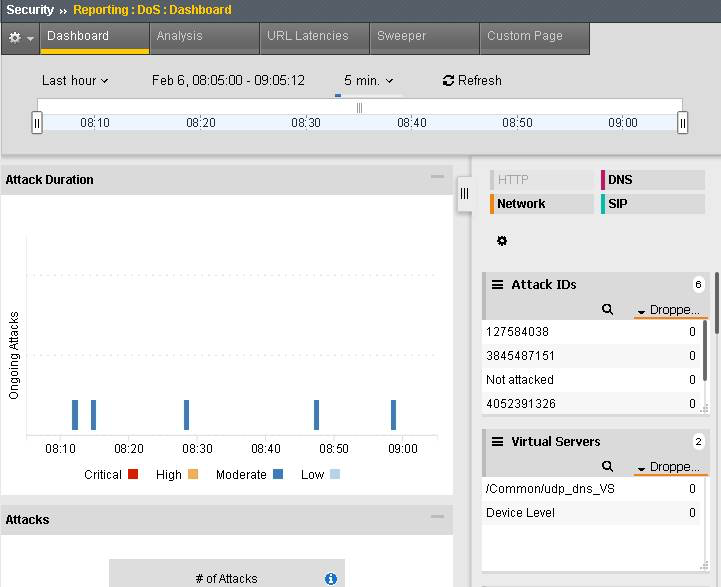
- Navigate to Security > Reporting > DoS > Dashboard to view an overview of the DoS attacks and timeline. You can select filters in the filter pane to highlight specific attacks.
Finally, navigate to Security > Reporting > DoS > Analysis. View detailed statistics around each attack.
Remote Triggered Black Holing
The BIG-IP supports the advertisement of bad actor(s) to upstream devices via BGP to block malicious traffic closer to the source. This is accomplished by publishing a blacklist to an external resource. This is not demonstrated in this lab.
Silverline Mitigation
F5’s cloud-based scrubbing service Silverline offers “always on” and “on demand” DDoS scrubbing that could assist in this scenario as well. This is not demonstrated in this lab.
Filtering specific DNS operations
The BIG-IP offers the ability to filter DNS query types and header opcodes to act as a DNS firewall. To demonstrate, we will block MX queries from our DNS server.
Open the SSH session to the attack host.
- Perform an MX record lookup by issuing the following command:dig @10.20.0.10 MX example.com
The server doesn’t have a record for this domain. This server doesn’t have MX records, so those requests should be filtered
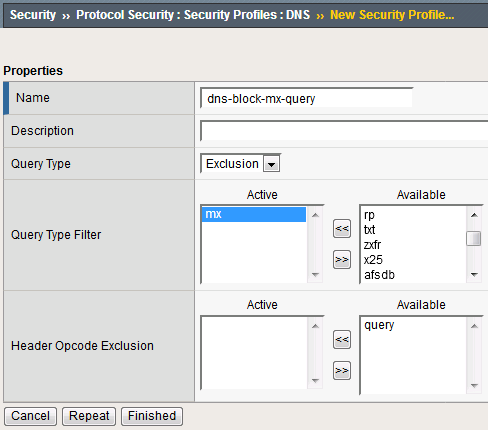
Navigate to Security > Protocol Security > Security Profiles > DNS and create a new DNS security profile with the following values, leaving unspecified attributes at their default value:
Name: dns-block-mx-query
- Query Type Filter: move mx from Available to Active
Navigate to Local Traffic > Profiles > Services > DNS. NOTE: if you are mousing over the services, DNS may not show up on the list. Select Services and then use the pulldown menu on services to select DNS.
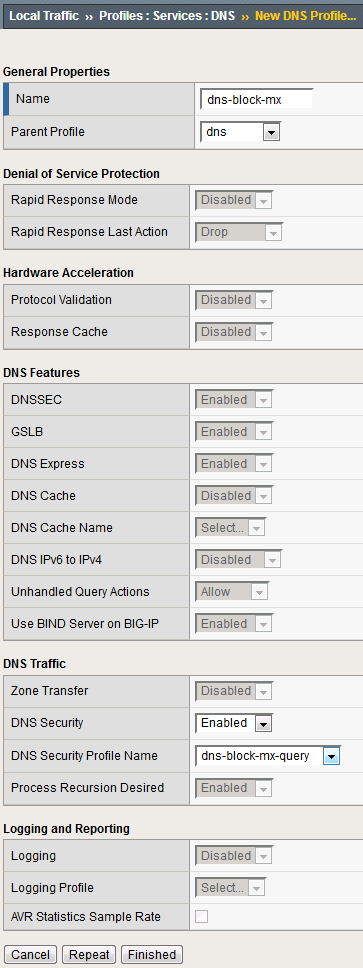
Create a new DNS services profile with the following values, leaving unspecified values at their default values:
Name: dns-block-mx
DNS Traffic
DNS Security: Enabled
- DNS Security Profile Name: dns-block-mx-query
Navigate to Local Traffic > Virtual Servers > Virtual Server List.
Click on the udp_dns_VS virtual server name.
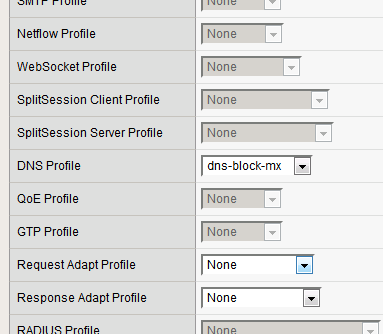
In the Configuration section, change the view to Advanced.
- Set the DNS Profile to dns-block-mx.
Click Update to save your settings.
Navigate to Security > Event Logs > Logging Profiles.
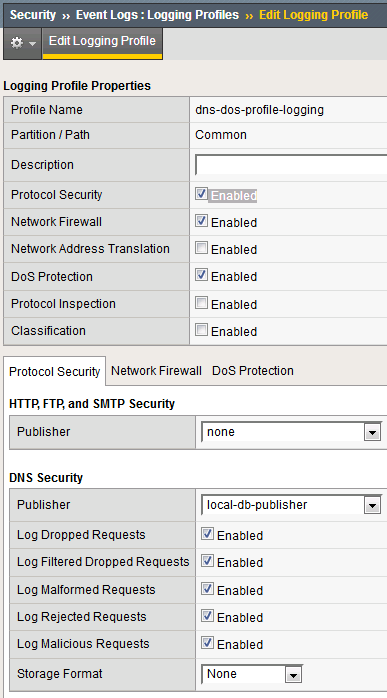
Click on the dns-dos-profile-logging logging profile name.
Check Enabled next to Protocol Security.
- In the Protocol Security tab, set the DNS Security Publisher to local-db-publisher and check all five of the request log types.
Make sure that you click Update to save your settings.
- Return to the Attack Server SSH session and re-issue the MX query command:dig @10.20.0.10 MX example.com
The query hangs as the BIG-IP is blocking the MX lookup.
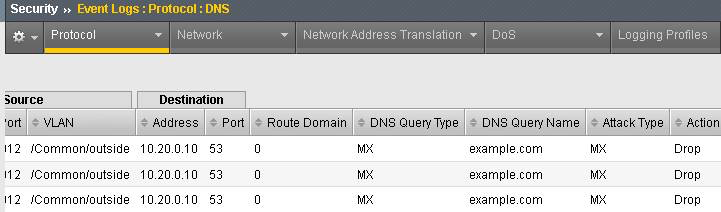
- Navigate to Security > Event Logs > Protocol > DNS. Observer the MX query drops.
Attention
This concludes the DNS portion of the lab. On the victim server, stop the top utility by pressing CTRL + C.