F5 Firewall Solutions > [Archive1] AFM - The Data Center Firewall > Lab 5 - Network Security (AFM) Management Workflows Source | Edit on
Network Security (AFM) Management Workflows
Workflow 1: Managing AFM from BIG-IQ
Day 4, it turns out no one thought about managing the new web and application servers, as such SSH is blocked to both devices. Let’s first validate this by using the packet tester tool within BIG-IQ, note this is the same tool within BIG-IP with one major exception. Within BIG-IQ you can trace a packet through more than one firewall. This is very useful if you have multiple AFM devices in a packets path, now you can test the flow end to end from one central location.
Task 1 – Packet Tracer
Navigate to Monitoring > Reports > Security > Network Security > Packet Traces
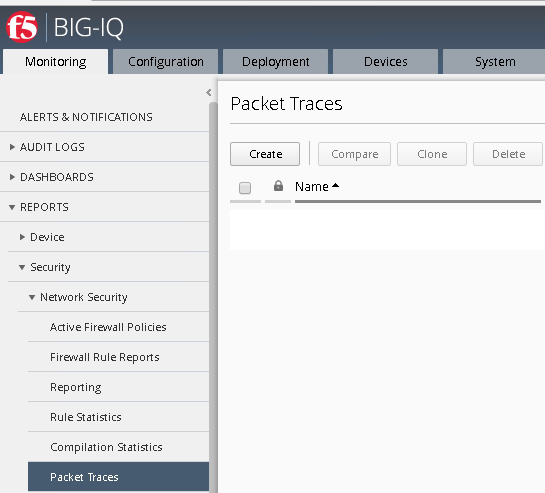
Click on the “Create” button from the top menu.
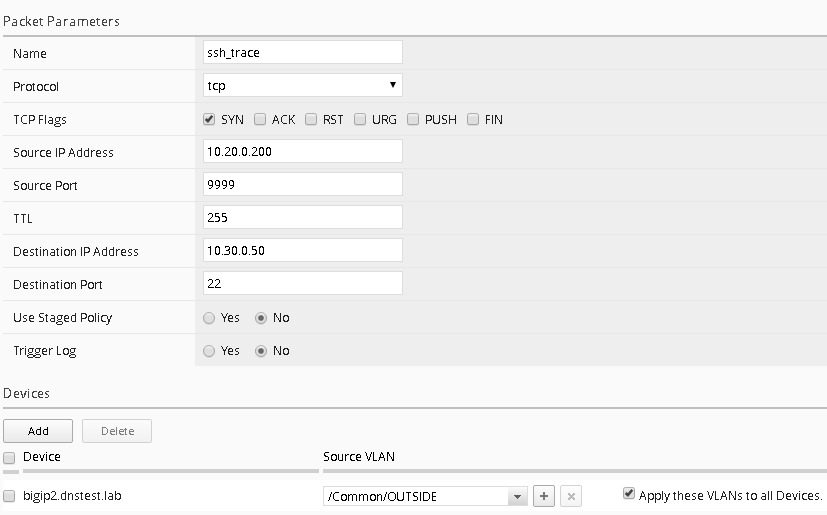
Complete the following information
- Name – ssh_trace
- Protocol – tcp
- TCP Flags – Syn
- Source IP Address – 10.20.0.200
- Source Port – 9999
- Destination IP Address – 10.30.0.50
- Destination Port – 22
- Use Staged Policy – No
- Trigger Log – No
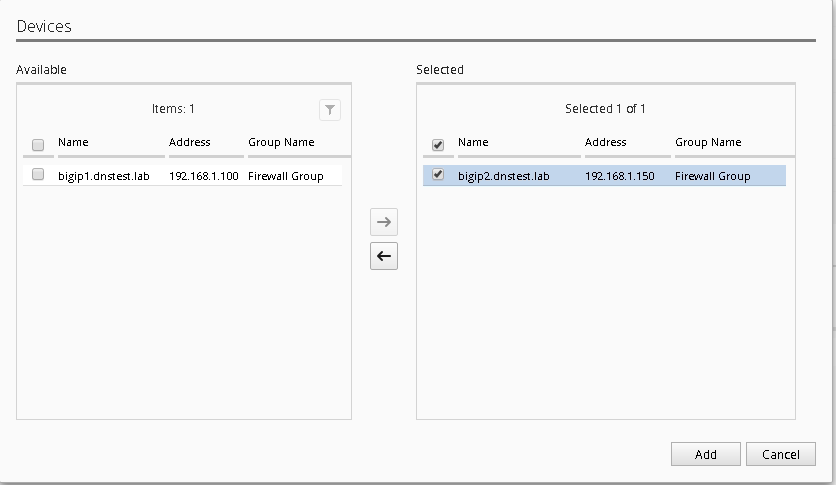
Under the Devices section click “Add” (notice you’ll see all the devices with AFM provision listed), for our lab however; just add bigip2.dnstest.lab
Select the “/Common/OUTSIDE” Vlan as the Source VLAN from the dropdown.
When completed your screen should look like the screen shot below:
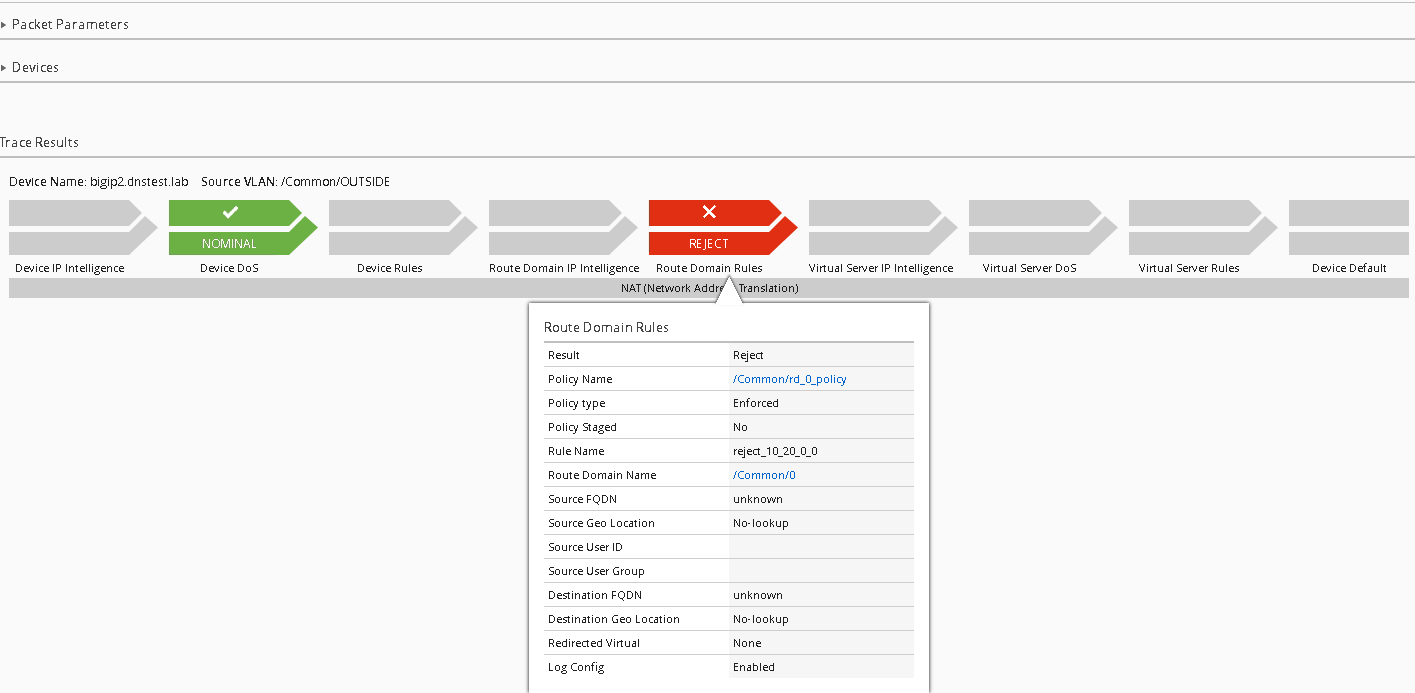
Click “Run Trace”
You can see from the trace results; the traffic is indeed being denied
Another nice feature of Packet Trace within BIG-IQ is the ability to clone a trace, when you complete the next two tasks, we’ll return to the packet tracer tool to re-run the results using the clone option. Additionally, the traces are saved and can be reviewed later, this can be very helpful in long troubleshooting situations where application teams are asking for results after changes are made to policies.
Follow the steps below to allow SSH access to both devices using BIG-IQ as a central management tool.
Task 2 – Modify Rule Lists
Navigate to the Configuration > Security > Network Security > Rule Lists
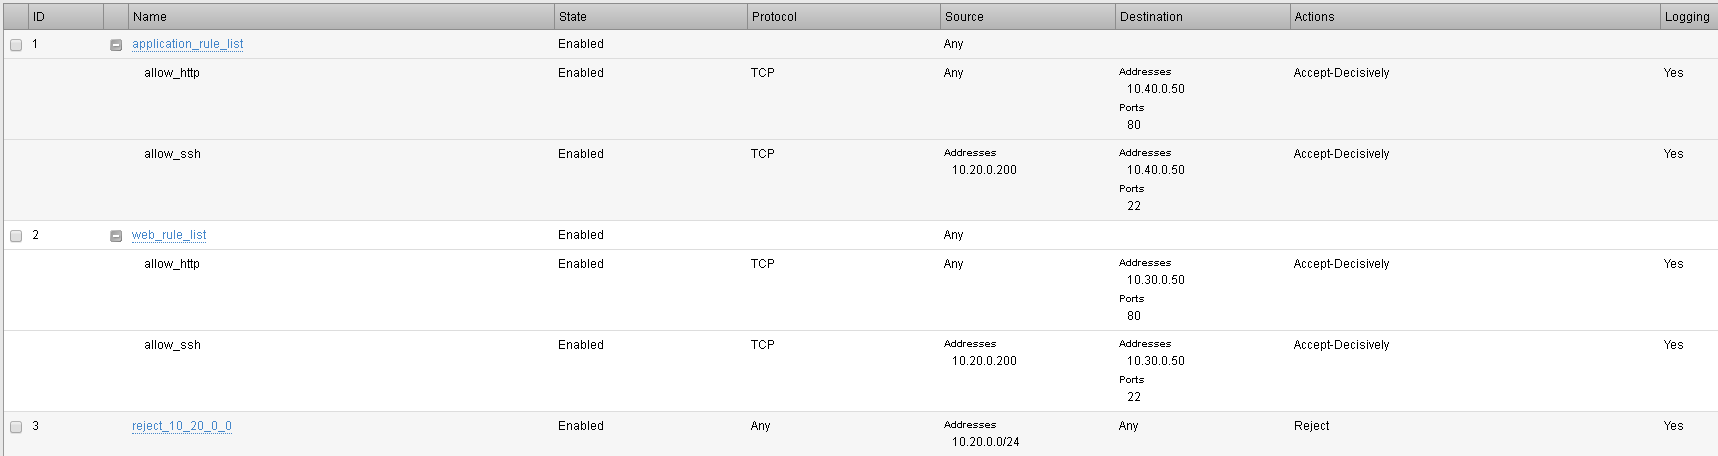
Notice the previously created rule lists have been imported into BIG-IQ
Click on the “application_rule_list”
Click Create Rule button.
Click on the pencil (edit rule) of the newly created rule listed with Id of 2.
Create a new rule with the below information. Be prepared to scroll to find all the options
Name allow_ssh Source Address 10.20.0.200 Source Port any Source VLAN any Destination Address 10.30.0.50 Destination Port 22 Action Accept-Decisively Protocol TCP State enabled Log True (checked) Click Save & Close when finished.
Repeat the same procedure for the web_rule_list, be sure to change the destination to 10.30.0.50, all other setting remains the same.
Task 3 – Deploy the Firewall Policy and related configuration objects
Now that the desired firewall configuration has been created on the BIG-IQ, you need to deploy it to the BIG-IP. In this task, you create the deployment, verify it, and deploy it.
From the top navigation bar, click on Deployment (tab).
Click on the EVALUATE & DEPLOY section on the left to expand it.
Click on Network Security in the expansion.
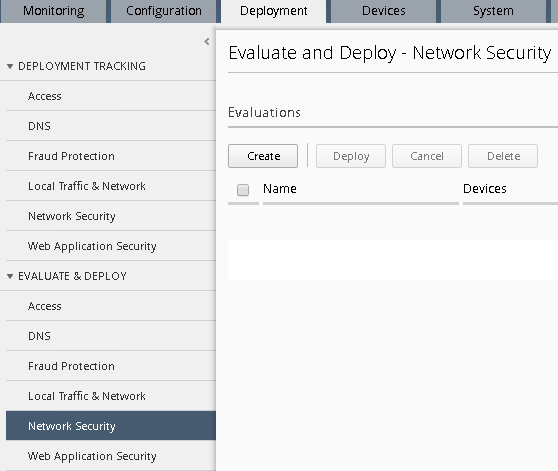
Click on the top Create button under the Evaluations section.
Give your evaluation a name (ex: deploy_afm1).
Evaluation Source should be Current Changes (default).
Source Scope should be All Changes (default)
Remove Unused Objects should be Remove Unused Objects (default)
Target Device(s) should be Device.
Select bigip2.dnstest.lab from the list of Available devices and move it to Selected area.

Click the Create button at the bottom right of the page.
You should be redirected to the main Evaluate and Deploy page.
This will start the evaluation process in which BIG-IQ compares its working configuration to the configuration active on each BIG-IP. This can take a few moments to complete.
The Status section should be dynamically updating… (What states do you see?)
Once the status shows Evaluation Complete you can view the evaluation results.
Note
Before selecting to deploy, feel free to select the differences indicated to see the proposed deployment changes. This is your check before making changes on a BIG-IP.
Click the number listed under Differences – Firewall.
Scroll through the list of changes to be deployed.
Click on a few to review in more detail.
What differences do you see from the Deployed on BIG-IP section and on BIG-IQ?
Do you see the new rules you created in BIG-IQ? Ya should…
Click Cancel.
Deploy your changes by checking the box next to your evaluation deploy_afm1.
With the box checked, click the Deploy button.
Your evaluation should move to the Deployments section.
After deploying, the status should change to Deployment Complete.
- This will take a moment to complete. Once completed, log in to the BIG-IP and verify that the changes have been deployed to the AFM configuration.
Congratulations, you just deployed your first AFM policy via BIG-IQ!
Review the configuration deployed to the BIG-IP units.
On bigip2.dnstest.lab: (https://192.168.1.150)
Navigate to Security > Network Firewall > Policies.
Click on rd_0_policy and expand the rule lists
Are the two rules you created in BIG-IQ listed for this newly deployed firewall policy?
Test Access:
- Open a new Web browser and access http://10.30.0.50
- Open Putty and access 10.30.0.50
Task 4 – Packet Tracer (continued)
#. Navigate to the Monitoring tab Reports Security Network Security Packet Tracers
Highlight the previous trace (ssh_trace) and click on the “Clone” button

You’ll notice all the previously entered values are pre-populated, you now can make any changes if necessary (maybe the application team realized the source port of the flow is not random).
Click “Run Trace”
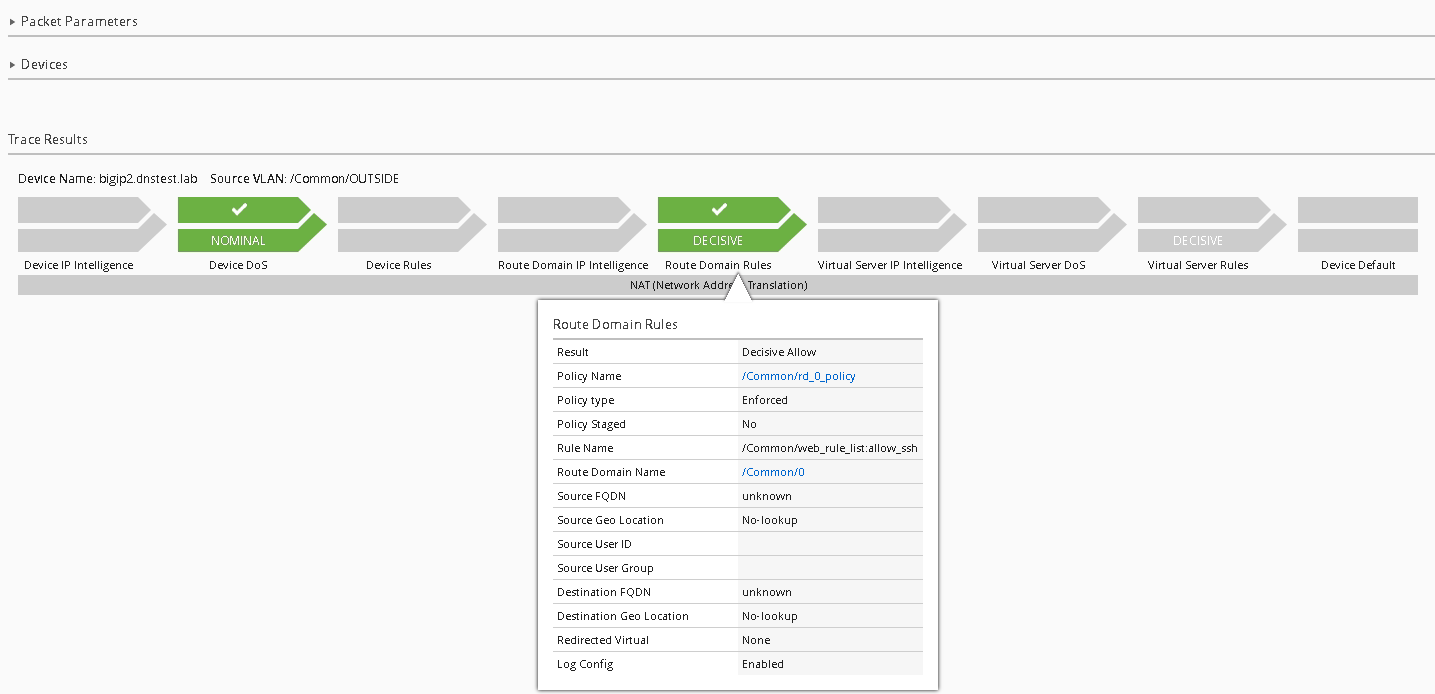
SUCCESS!!
The history within the tool makes Root Cause Analysis (RCA) reports very easy, this allows the security team to show a denied flow and subsequent permitted flow.