F5 Firewall Solutions > [Archive1] AFM - The Data Center Firewall > Lab 3 - AFM DDoS Lab > Advanced Firewall Manager (AFM) Detecting and Preventing System DoS and DDoS Attacks Source | Edit on
Single Endpoint Flood
The single endpoint flood attack is an attempt for an attacker to send a flood of traffic to a host in hopes of overwhelming a service to a point of failure. In this example, we’ll flood the target server with ICMP packets.
In the BIG-IP web UI, navigate to Security > DoS Protection > Device Configuration > Network Security.
Expand the Single-Endpoint category in the vectors list.
Click on Single Endpoint Flood vector name.
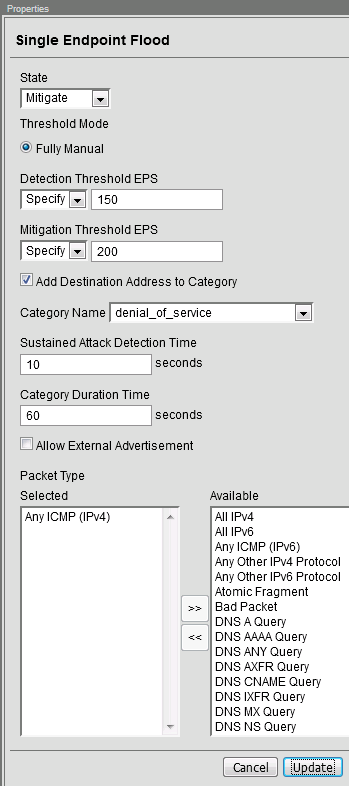
Configure the vector with the following parameters:
State: Mitigate
Threshold Mode: Fully Manual
Detection Threshold EPS: 150
Mitigation Threshold EPS: 200
Add Destination Address to Category: Checked
Category Name: denial_of_service
Sustained Attack Detection Time: 10 seconds
Category Duration Time: 60 seconds
- Packet Type: Move Any ICMP (IPv4) to Selected
Click Update to save your changes.
Open the BIG-IP SSH session and scroll the ltm log in real time with the following command:
tail -f /var/log/ltmWe’ll run a packet capture on the victim server to gauge the incoming traffic. On the victim server, issue the following command:
sudo tcpdump -nn not port 22- On the attack host, launch the attack by issuing the following command on the BASH prompt:
sudo hping3 10.20.0.10 --faster -c 25000 --icmp The attack host will begin flooding the victim server with ICMP packets. However, you will notice that the traffic to the server stops after a short time (10 seconds, the configured sustained attack detection time.)
After approximately 60 seconds, run the attack again. ICMP traffic will return to the host. This is because the IP Intelligence categorization of the attack host has expired.
Return to the BIG-IP web UI.
Navigate to Security > Event Logs > DoS > Network > Events. Observe the log entries showing the details surrounding the attack detection and mitigation.
Navigate to Security > Event Logs > Network > IP Intelligence. Observe the log entries showing the mitigation of the sweep attack via the ip-intelligence policy.
Navigate to Security > Reporting > Network > IP Intelligence. Observe the statistics showing the sweep attack and mitigation.
Navigate to Security > Reporting > DoS > Dashboard to view an overview of the DoS attacks and timeline. You can select filters in the filter pane to highlight the specific attack.
Finally, navigate to Security > Reporting > DoS > Analysis. View detailed statistics around the attack.
This concludes the DoS/DDoS portion of the lab. You have successfully defeated Joanna, she has decided a career at Chotchkie’s is more prosperous than nefarious internet activities, even with the new flair requirements. Well done!