F5 Firewall Solutions > [Archive1] AFM - The Data Center Firewall > Lab 3 - AFM DDoS Lab > Detecting and Preventing DNS DoS Attacks on a Virtual Server Source | Edit on
Base BIG-IP Configuration
In this lab, the VE has been configured with the basic system settings and the VLAN/self-IP configurations required for the BIG-IP to communicate and pass traffic on the network. We will now need to configure the BIG-IP to listen for traffic and pass it to the back-end server.
Launch the Chrome shortcut titled “BIG-IP UI” on the desktop of your lab jump server. For this lab you will be working on bigip1.dnstest.lab (http://192.168.1.100). The credentials for the BIG-IP are conveniently displayed in the login banner. Just in case: admin / 401elliottW!
Navigate to Local Traffic > Nodes and create a new node with the following settings, leaving unspecified fields at their default value:
Name: lab-server-10.10.0.50
- Address: 10.10.0.50
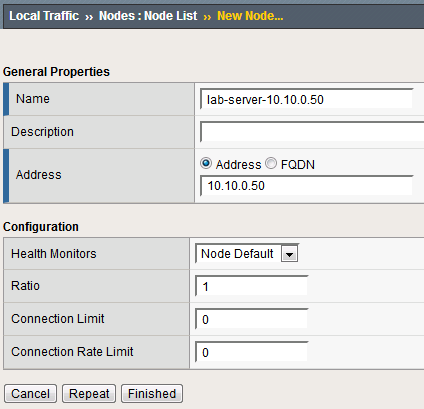
Click Finished to add the new node.
Navigate to Local Traffic > Pools and create a new pool with the following settings, leaving unspecified attributes at their default value:
Name: lab-server-pool
Health Monitors: gateway_icmp
- New Members: Node List
Address: lab-server-10.10.0.50
Service Port: * (All Services)
- Click Add to add the new member to the member list.
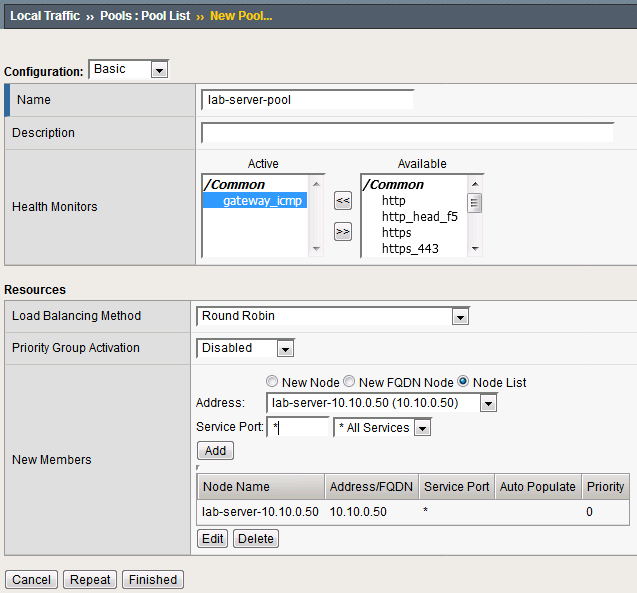
Click Finished to create the new pool.
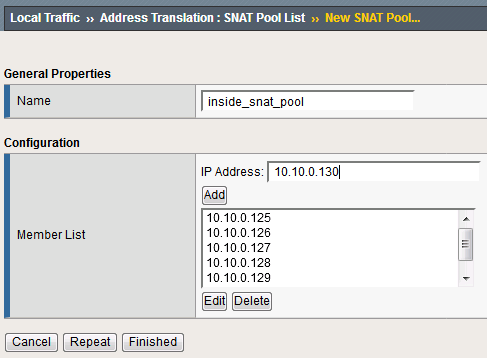
Because the attack server will be sending a huge amount of traffic, we’ll need a large SNAT pool. Navigate to Local Traffic > Address Translation > SNAT Pool List and create a new SNAT pool with the following attributes:
Name: inside_snat_pool
- Member List (click Add after each IP):10.10.0.125, 10.10.0.126, 10.10.0.127, 10.10.0.128, 10.10.0.129, 10.10.0.130
- Click Finished
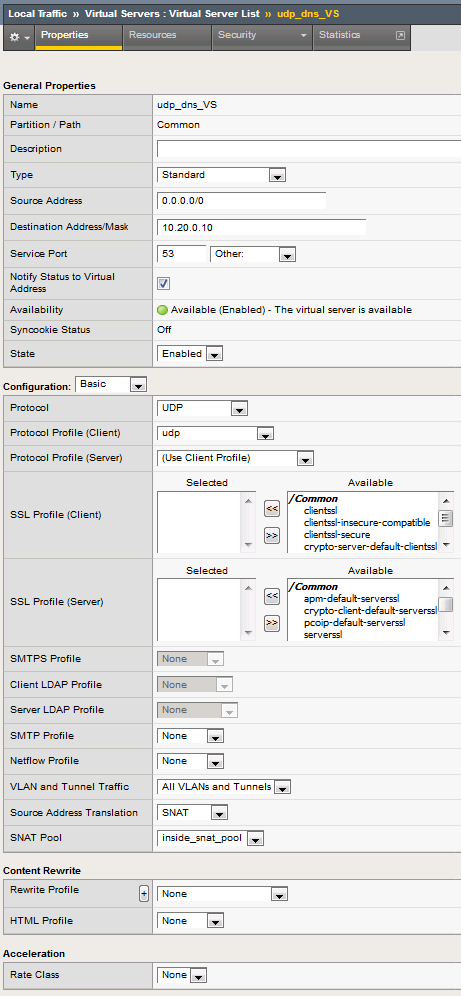
Navigate to Local Traffic > Virtual Servers and create a new virtual server with the following settings, leaving unspecified fields at their default value:
- Name: udp_dns_VS
- Destination Address/Mask: 10.20.0.10
- Service Port: 53 (other)
- Protocol: UDP
- Source Address Translation: SNAT
- SNAT Pool: inside_snat_pool
- Default Pool: lab-server-pool
- Click Finished
We’ll now test the new DNS virtual server. SSH into the attack host by clicking the “Attack Host (Ubuntu)” icon on the jump host desktop.
- Issue the
dig @10.20.0.10 www.example.com +shortcommand on the BASH CLI of the attack host. You should see output similar to: This verifies that DNS traffic is passing through the BIG-IP.
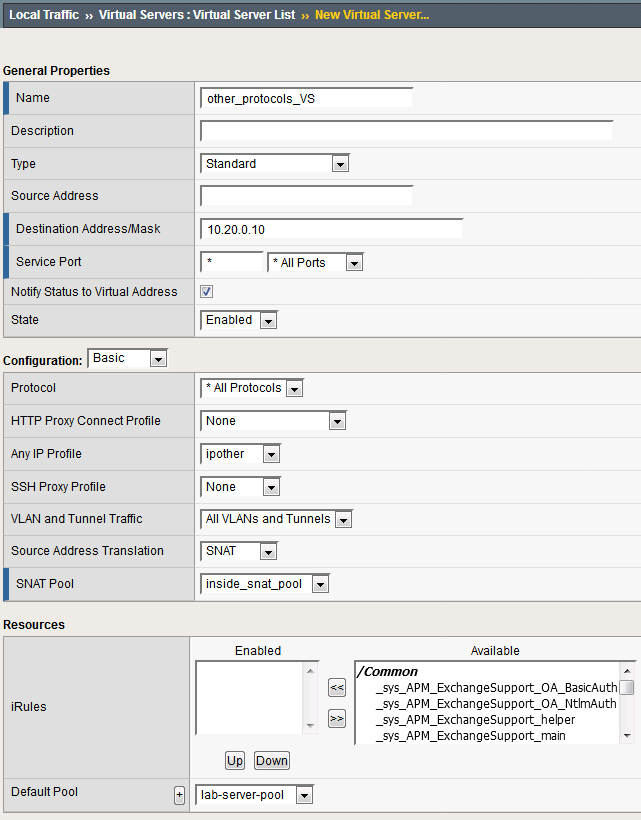
 Return to the BIG-IP and navigate to Local Traffic > Virtual Servers and create a new virtual server with the following settings, leaving unspecified fields at their default value:
- Name: other_protocols_VS
- Destination Address/Mask: 10.20.0.10
- Service Port: * (All Ports)
- Protocol: * All Protocols
- Any IP Profile: ipother
- Source Address Translation: SNAT
- SNAT Pool: inside_snat_pool
- Default Pool: lab-server-pool
- Click Finished
Return to the Attack Host SSH session and attempt to SSH to the server using SSH 10.20.0.10. Simply verify that you are prompted for credentials and press CTRL+C to cancel the session. This verifies that non-DNS traffic is now flowing through the BIG-IP.